Creating a Table of Contents in Word 365 is not only useful for long documents but also for short reports. By using different heading levels, you can create a more organized table of contents.

Guidelines for creating a more professional Table of Contents in Word 365
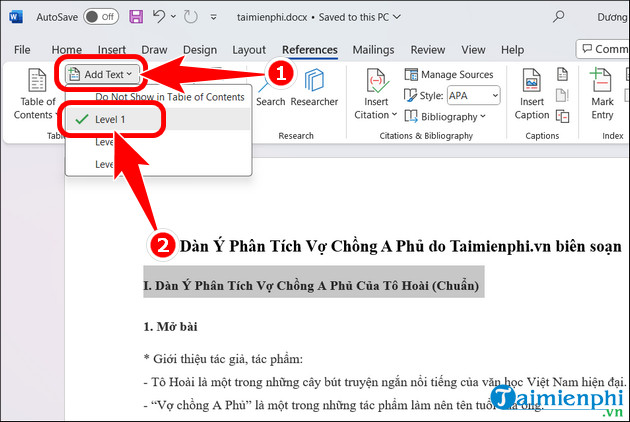
Step 1: Select the heading you want to display in the table of contents => press References.

Step 2: Press Add Text => choose the Level for the heading, for example, Minprice selects Level 1 for items I, II, III,... as it's the largest heading. Continue this process for smaller headings with Level 2 or 3.
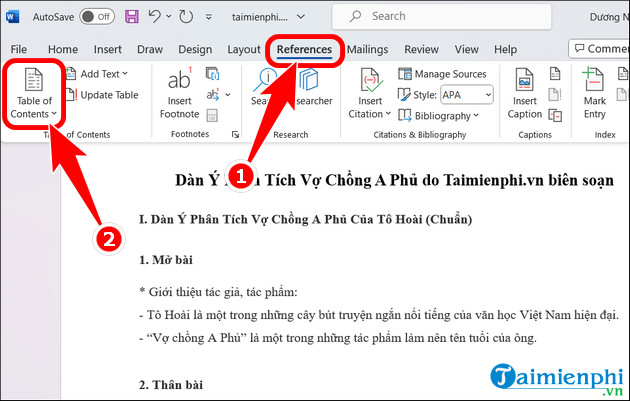
Step 3: After completing the Level setup, click References => press Table of Contents.
- Here, you can use predefined templates or create your own table of contents with Custom Table of Contents.
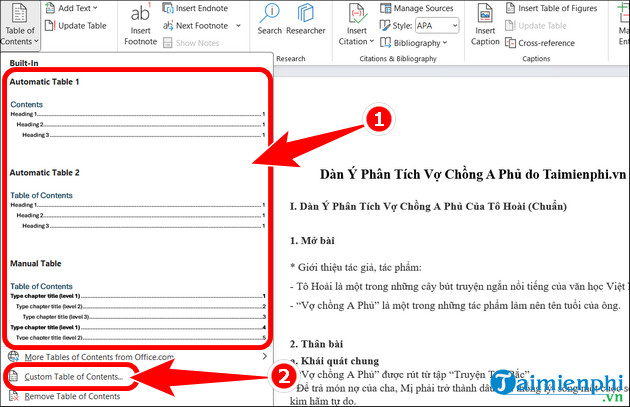
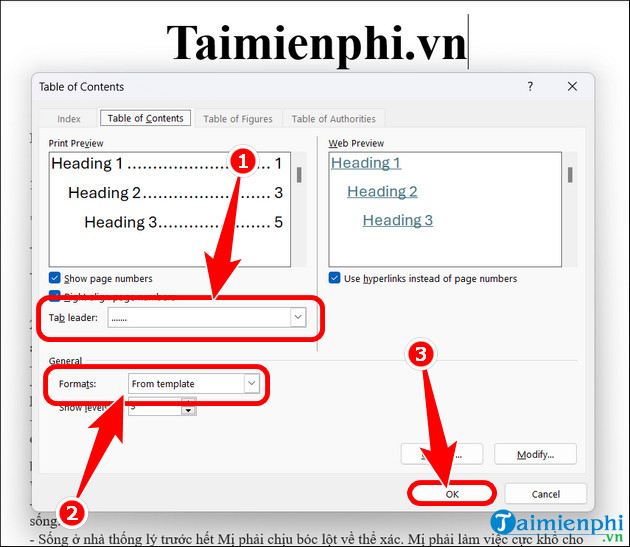
- When choosing Custom Table of Contents, users can customize Tab leader, Format (Table of Contents format) => OK.
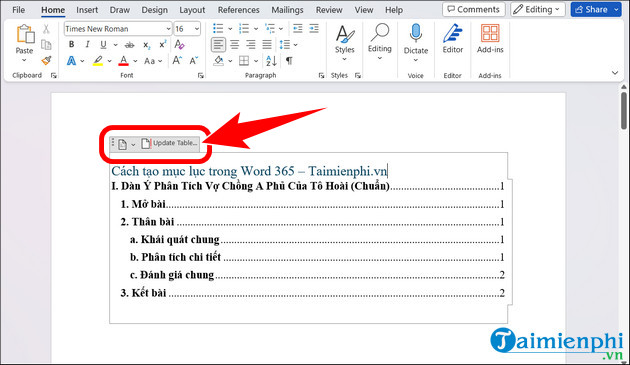
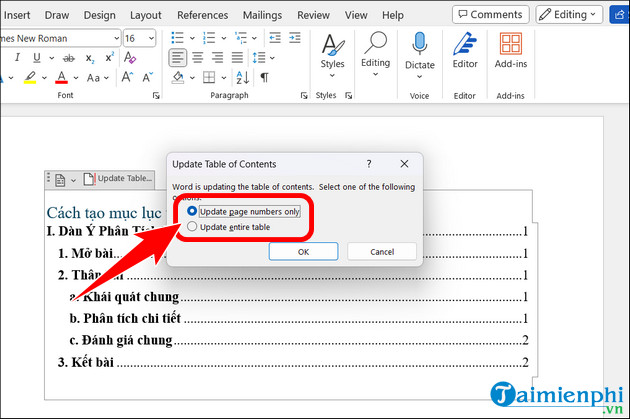
Step 4: The successful result of creating a table of contents in Word 365 will be displayed as shown below. If you want to change the content of the table of contents during editing, you can use the Update Table feature.
- A dialog box will appear for you to choose Update page number only or Update entire table.
Additionally, margin alignment is a necessary technique to make documents look more professional. So, if you're not familiar with how to align margins in Word 365, don't miss out on Minprice's article.
Why create a table of contents in Word 365?
- Efficient Organizational Structure: A table of contents helps you organize the structure of the document clearly and logically. By dividing content into different sections and topics, the table of contents makes it easier for you to navigate information.
- Time Saving: Instead of manually adding page numbers or links to each section of the document, the table of contents feature in Word 365 will significantly save you time.
- Professional Impression: A well-designed and accurate table of contents will create a positive impression on your readers and colleagues. It's an essential element to enhance the aesthetic value of the document.
- Flexible Customization: Word 365 offers various customization options for the table of contents, from choosing predefined templates to fine-tuning levels and font styles. This allows you to freely tailor the table of contents to suit your document.
Through these basic steps, you'll find the process of creating a table of contents in Word 365 becomes incredibly simple, saving you significant time. This enhances both your work efficiency and office software skills.